In this tutorial I use Strip Silence to remove the snare drum hits from a bass/kick drum track. The snare sound was unintentionally also recorded by the same microphone used to record the bass/kick drum track. The unintentional pickup of one instrument while recording another is often referred to as "bleed" or "spill" or "leakage". All three words are often used interchangeably.
Note: Save your Pro Tools session prior to using Strip Silence or performing any other editing. Duplicate a track's playlist or the entire track prior to editing. Make editing changes on the duplicate. If something goes wrong or you don't like the changes you've made you still have the original. See my "Tips" section at the end of this tutorial if you need help duplicating a track or it's playlist.
To use Strip Silence on an entire track:
- Left click in the lower half of the track to select and highlight the entire track.
- Press and hold down the Ctrl then the U key on your keyboard to open the "Strip Silence" utility. See image below.
- Drag the "Strip Threshold" slider completely to the right.
- Zero the three remaining controls by dragging the sliders to the left.
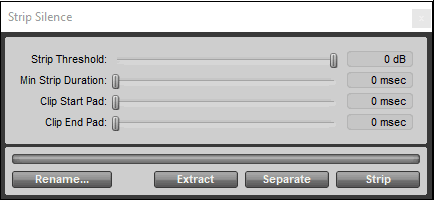
- Drag the "Strip Threshold" slider to the left until each drum hit has a pair of closely spaced, vertical white lines at the left. See image below.
Review the entire track to verify this step before continuing. You need to experiment with the Strip Threshold setting to get the best setting and result. Review the track for softer hits that may be missed. Reduce the Strip Threshold setting to catch softer hits as/if needed.
TIP: Press and hold down the Ctrl key while dragging a slider for fine control of adjustments.

- Drag the "Clip Start Pad" slider to adjust the time length before the transient/beginning of the sound. Leave enough space at the front of the transient to allow you to create a "fade-in" after you are finished using Strip Silence.

- Drag the "Clip End Pad" slider to adjust the time length after the transient.

- Your drum hits should look similar to the image below. Each drum hit should have a white rectangle around it. There should be room before the transient/beginning of each hit. The right hand edge of the rectangle should extend to the end of the decay portion of the drum hit envelope. Listen and experiment to get the sound you want.

- Adjust the "Minimum Strip Duration" slider as/if needed to separate hits that are very close together. Experiment!
- Click the "Strip" button. Review the track to ensure you've stripped out what you wanted to remove. Manually edit and remove any section of sound you do not want and could not remove using Strip Silence. Left click on the lower half of any unwanted clip to select it, then press the Delete key.
- Visually inspect the track to make sure Strip Silence both removed and retained what you wanted it to. Listen to the track as the final quality check. Listen for sound dropouts, clicks and other unwanted noise.
- Add fade-in/outs to all the drum hit clips on the track. Fades will help prevent clicks or pops from occurring when the stripped audio clips are played. See my tips below.
TIPS:
Duplicate a track's playlist or the entire track prior to editing. Make editing changes on the duplicate to allow you to easily return to the original if something goes wrong or you don't like the changes you've made.
To duplicate a tracks playlist:
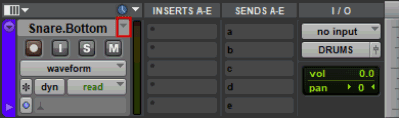
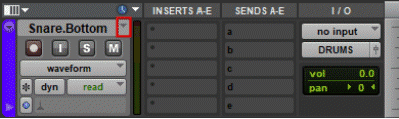
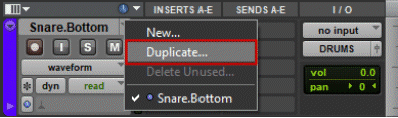
- Left click on the track's playlist selector. I've drawn a red line around the playlist selector in the image below.
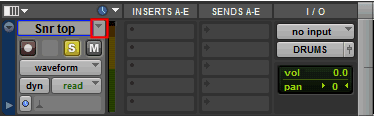
- Left click on "Duplicate…" in the menu that appears.
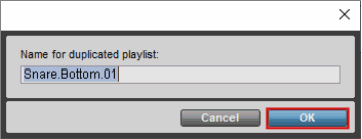
- Type a name for the duplicate or use the name that is automatically assigned.
- Left click on the "OK" button.
To duplicate a track:
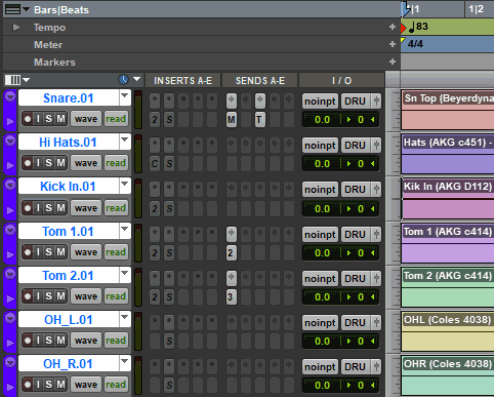
- Right click the name of the track in the Edit or Mix window then choose "Duplicate…".
- Left click on the "OK" button to use the default settings.
Working on a duplicate of a track allows you to use the original as a reference to ensure you have not removed something you wanted to retain. You can keep both tracks visible in the session to compare them. Make the track you do NOT want to use inactive.
INCREASE the size of the track view to make it easier to see the editing you are performing.
To increase the size of the track view:
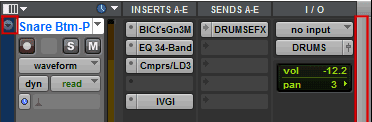
- Left click on the tiny down arrow to the left of the track name or right click on the grey bar before the start of the tracks clip. (see the image below)
- Choose your preferred size of the track view from the list that appears.
- Press and hold down the Ctrl key while dragging a slider for finer control of the slider.
- Press the t key on your keyboard and zoom out of the clip/track to verify you have not removed any part of the sound that you did not intend to remove. Press the r key to zoom back in to the track. For these quick keys to work, you must click on the a/z button inthe upper right corner of the edit window. It is yellow when enabled. (see image below) This button enables "Command Focus" keyboard shortcuts.

- Use the original track as a reference to ensure you have not accidentally deleted something from the track you wanted to keep. Position the original track above the edited track and compare them from beginning to end. If you are working on a drum track look for drum hits that may have been inadvertently stripped out or deleted.
Automatically add fades:
Add fades to the beginning and end of each remaining stripped out audio clip. Fades will help prevent clicks or pops from occurring when the stripped audio clips are played.
- Select all the stripped out clips on the track. To select the entire track and all its clips, click in the upper half of any clip on the track. Press and hold down the Ctrl key then the letter "a" key on your keyboard.
- Press and hold down the Ctrl then the f key on your keyboard. The "Batch Fades" window will appear. A 10 to 15 millisecond fade in setting is a good starting point. Adjust as/if needed to ensure that fade-ins have not removed the beginning/transient of any drum hits clips. Adjust the fade-out setting to control how long the drum hit sustains until it decays/ends. How long should the fade-out be? Experiment with different settings. Listen to the drum in the mix to see how different fade-out settings sound.
- Left click on the "OK" button to automatically add a fade-in and a fade-out to each stripped out clip on the track.
NOTE: Listen to the entire track after you've used Strip Silence and added fades to ensure the track sounds as you intended.
Use Strip Silence To "Clean" Tracks
Strip Silence has many uses. It is commonly used to remove unwanted sound between drum hits on a drum track.
For example, when a kick drum is recorded it is not uncommon for the kick drum microphone to also hear the snare drum and record it to the track along with the kick drum. With both drums present on the kick drum track whatever equalization or processing you apply to the kick drum will also affect the sound of the snare drum to a lesser degree. Strip Silence can be used to remove the sound of the snare drum hits from the kick drum track.
In this tutorial I used Strip Silence to remove the snare drum that was also recorded by the internal microphone intended to record the bass/kick drum. Why? When the drums are mixed together any EQ, compression or other processing or effects added to the bass/kick drum will also affect the snare drum to a lesser degree. The control we have over the sound of each drum individually (kick or snare) is reduced. If we remove or limit the snare sound presence in the kick drum track, we enhance our ability to control the sound of both drums individually.
Strip Silence can make drum tracks sound artificial if not used thoughtfully. If used on a snare track you need to listen to determine whether the drummer plays "ghost notes". Ghost notes can add interest to any snare part. If ghost notes are played are they crucial to the backbeat? Do they need to be heard? How do you think a drummer would respond to the previous questions?