Saturday, January 13, 2024

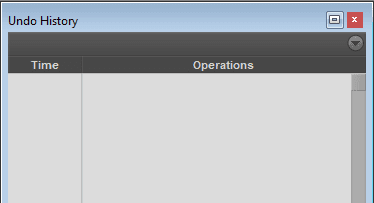
Undo History Window

By TOM BOWSER

Use the Pro Tools Undo History window to increase your speed and make fewer mistakes when editing.

You can undo or redo multiple operations at one time. You can see what can be undone or redone and are less likely to accidentally undo an edit you want to keep.

To open the Undo History window:

  • Left click on "Window" on the Pro Tools menu bar, then "Undo History"
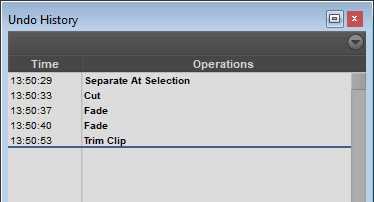
Undo History Window With Track
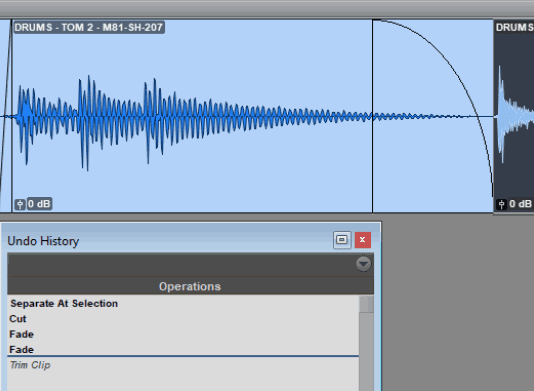
  • Undoable operations are shown in bold. All operations performed after the item you select are also undone. See the image above.
  • Redoable operations (operations already undone) are shown in italics.
  • Left click on a bolded operation to undo it.
  • Left click on an operation in italics to redo it.
Undo History Window Showing - Undo -Redo All

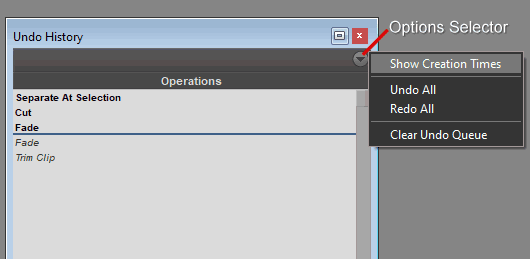
Left click on the "Options Selector" to:

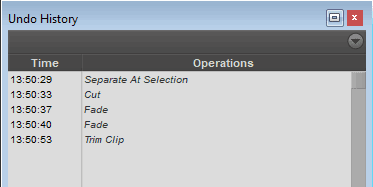
  1. Show Creation Times
Show Creation Times In The Pro Tools Undo History Window
  1. Undo All (operations in the undo history)
Undo All In The Pro Tools Undo History Window
  1. Redo All (operations in the undo history)
Redo All In The Pro Tools Undo History Window
  1. Clear Undo Queue
Clear Undo Queue In The Pro Tools Undo History Window

Monday, January 8, 2024

Reverse Changes You Made - Revert To Saved - Pro Tools

By TOM BOWSER

Not all changes made to a Pro Tools session can be undone or redone using the Undo History window or undo/redo key commands.

Use "Revert to Saved" if you need to undo changes that are no longer or never were available in the undo history.

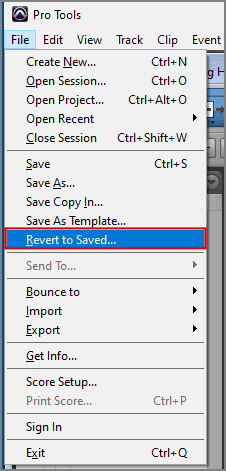
  • Left click "File" on the Pro Tools menu bar, then "Revert to Saved" to reverse changes you made and restore the session to how it was the last time it was saved.
Revert to Saved to Reverse Changes You Made In Pro Tools

Thursday, January 4, 2024

Set Multiple Aux Track Inputs At The Same Time - Pro Tools

By TOM BOWSER

The following steps set the inputs of all selected aux tracks to a series of unused sequential buses. This process is faster than manually setting the input of each aux track individually. It works well when creating a new session or session template.

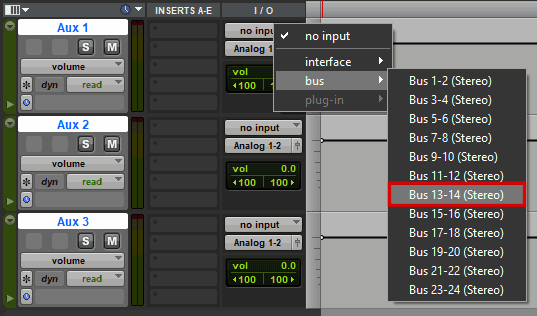
For this tutorial to work as described there must be sequential unused buses. You know a bus is NOT used when it's name is colored white, not yellow. For example, in the second image below the name "Buses 13-14 (Stereo)" is white and unused.

The aux tracks and buses must be the same width, either mono or stereo. In the example below, I'm using stereo Aux tracks that I pair with stereo buses

Set Multiple Aux Track Inputs At The Same Time:

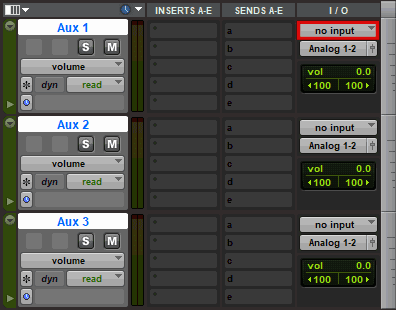
  1. Select all of the tracks you want to set the input for. See the image below.
  2. Press and hold down the Shift + Ctrl + Alt keys on your keyboard.
  3. Left click on the Input Path selector of the first aux track in the group of tracks you want to set the input for. I've drawn a red line around the input selector of the Aux 1 track in the image below.
Input Path Selector In Pro Tools
  1. Hover your mouse cursor over the word "bus" on the menu.
Assign Buses To Inputs In Pro Tools
  1. Left click on an available pair of buses on the menu. Refer to the image above.

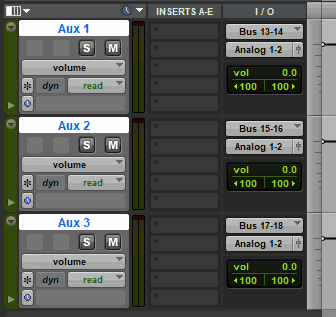
    In this example, I want to assign 3 sequential pairs of stereo busses to 3 stereo aux tracks. I'll select Buses 13-14 (Stereo). These buses will be assigned to the first selected stereo Aux track (Aux 1 in the image above). The Aux 2 track will automatically be assigned Bus 15-16 and the Aux 3 track will be assigned Bus 17-18. See the image below.

Set The Track Input To A Bus In Pro Tools